WHO LOVES CANE WEBBING?! Redo Louvered Bifold Doors with Cane Webbing! (You should totally see how I use cane webbing as candle holder covers here!)
*This post may include affiliate links.
I didn’t have much of an opinion of cane webbing back in 198? when sitting on my mom’s dining room chairs. I was FAR more concerned about the style of my bangs.
However, the life of cane webbing, just like 80’s music at high school dances, has made a COMEBACK.
Just spend a couple of minutes on Pinterest, and my case is proven. There is no point in arguing.
Aaanywho…

Our pantry and coat closet doors are (or were) those louvered, bifold doors.. which aren’t terrible doors. In fact, they can be quite charming. Unless they were like ours – patched, unfinished, and beyond the rescue of a good cleaning.

First thing’s first:
- We removed the doors.
- My husband used a Sharpie to mark the top of each door to make sure each pair and set came back together.
- Keep the hardware (ziploc bags are great).
- My husband sawed the slats up the center so they mostly just fell out.

- I filled holes, sanded the rough spots, and wiped down those dirty doors.
- We gave them a coat of primer – they liked had never been finished and wanted to be sure our expensive blue paint was put to it’s most efficient use.
- Then paint! I used the Emerald line of paint from Sherwin Williams in Sea Serpent (blue)
Let’s redo these louvered bifold doors with cane webbing!
I could not find it locally! I ended up going with Frank’s Cane and Rush online because that seemed to be the place most recommended in my own research. The product was great and came in a timely manner. Their billing system isn’t one-click easy, but they do a great job and are very responsive. I chose W901U – 1/2inch Open Mesh, Unbleached 24inch Width.
My door openings were 9” so a 24” width would give me enough for two doors and working room! You definitely want some room to work with. I ended up having about 1.5 inches extra on each side, and I ordered the sections long enough to give a couple extra inches on the top and bottom.
Originally, I intended to make the cane flush with the front of the doors, but that was just too difficult for my untrained hands… which caused an issue since we didn’t want to fill the slat gaps with filler because we worried it would just look too sloppy so we had to get creative to hide the gaps where the slats lived…

The photo above is the back of one of the doors (we didn’t paint the back – no one will see!). Because we needed to hide those slat holes, my husband cut a 1/4” thick board (what we used for our cheater shiplap walls and ceiling!) into 1 inch wide strips, and then cut them to the length of the openings.
Those strips had to be painted – paying special attention to the outward facing edge. The raw/cut edge of that lumber sucked that paint right up, so I did a couple extra coats on that thin edge. It was such a pain, but it just had to be done.
BUT!!! There’s one more detail cut we made to the strips. Your doors may or may not need this, but look just in case! The more you know!!

Notice the little cut made to the strip. Our doors have this little ledge that I guess the slats hid. I wanted the piece to come down to the lower “step”, so we (my husband) cut out a notch for that little detail. And then… I used my favorite gluing material – HOT GLUE ? to secure the strip to each side. This is the cordless hot glue gun I used!
I worked to line up the cane pattern before committing with the staple gun.

I read in several places online that one should soak the cane and stretch it when getting onto your piece. I tried that and found those pieces are the two doors with the jankiest cane lines ??♀️
Since I was not making the cane flush with the front of my doors, I did not need to tuck, fold, or bend my cane. Basically, I didn’t need it to be malleable so it didn’t need to be flexible (which is what soaking it seems to do).

I simply stapled down a flat plane. I did need to pull a bit, and not all doors have ? perfect lines, but they look really great and perfection is overrated. ?
AND THEN I BURNED A BUNCH OF CALORIES BY WORKING OUT USING A STAPLE GUN.

Y’all. These doors don’t just open themselves! When thinking about door knobs, I assumed I’d go with a brushed brass style because I LOVE GOLD STUFF. But then I was getting a old-fashioned vibe from my beautiful blue darlings and I surprised myself when I came home with glass knobs!
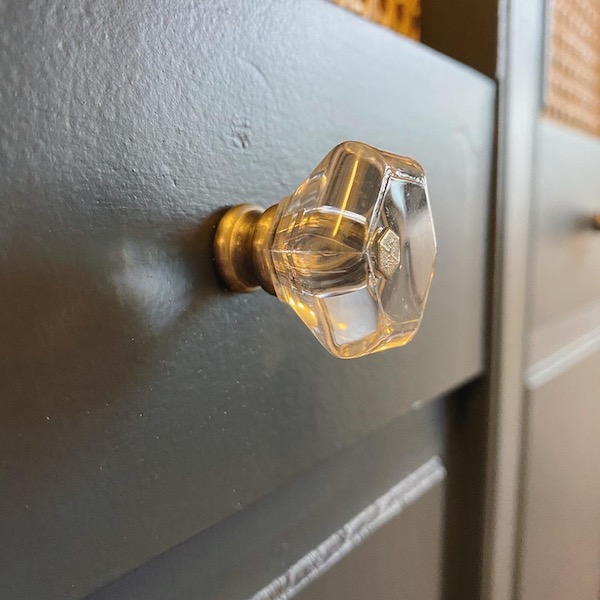
Thanks Home Depot!
What do you think? Would you take on redoing louvered bifold doors with cane webbing? Have you ever worked with cane webbing? I think I’d love to try to make a headboard at some point.
At some point.
If you like this post you might like:
- Candle Holder Covers with Cane Webbing
- Hallway Storage Transformation
- Fireplace Makeover
- Total Bathroom Remodel

If you have any questions about this project – feel free to leave it in the comments or drop me an email at jennyonthespot at gmail .com!

*This post may include affiliate links. As an affiliate I earn from qualifying purchases. This adds no cost to you, but I may receive a portion of sales for sharing here. These earnings help pay cover the costs involved in running this website. Enjoy this deals!